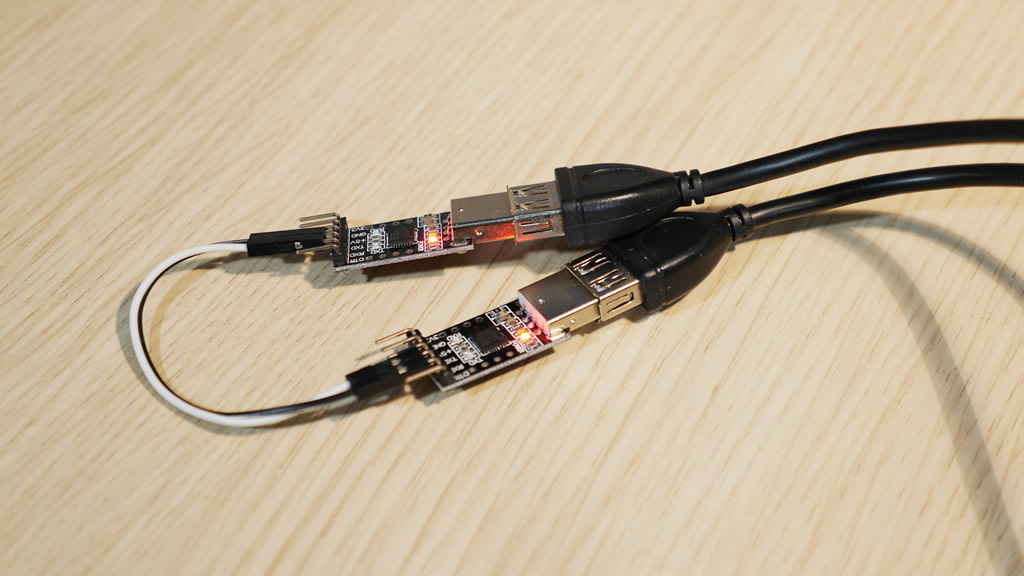
I was playing with these USB UART modules. These are small modules that can be used for any kind of serial communication using USB ports. I usually buy these from Chinese dealers using eBay, but beware that there are some made of really bad quality and even with wrong pins marked. Stay away from these red PCB colored modules; these work, but they have wrong Rx and Tx markings and there is no direct DTR connection.
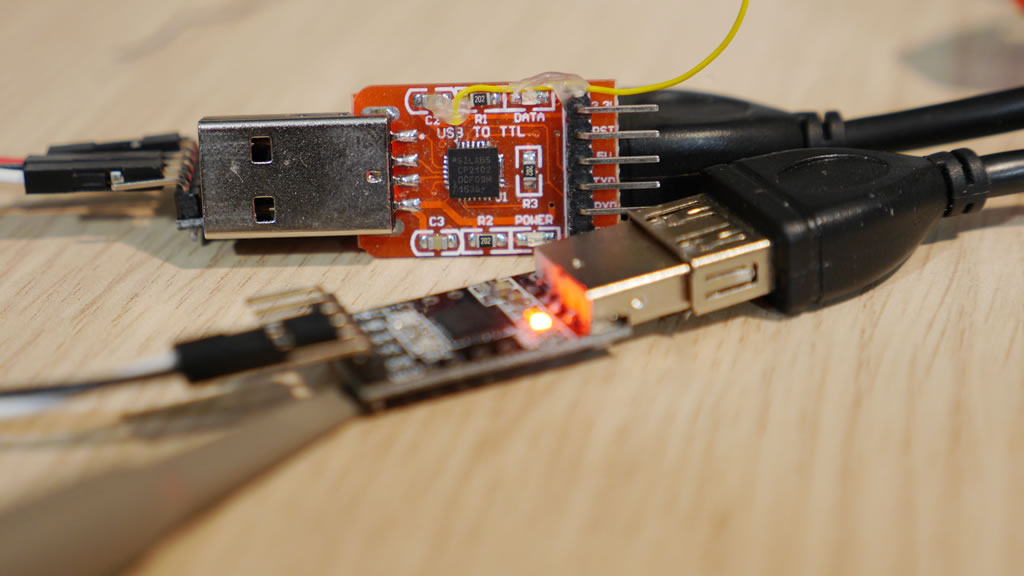
The simplest way to test these USB Modules, is to connect them each other and then transmit and receive data from one module to the other one. We connect both modules to the computer and we wait until the drivers are installed. In most of the cases, windows computers will recognize the module and install the drivers with no problems, but if it doesn’t, you can always download and install the drivers by searching the module/chip name on the internet.
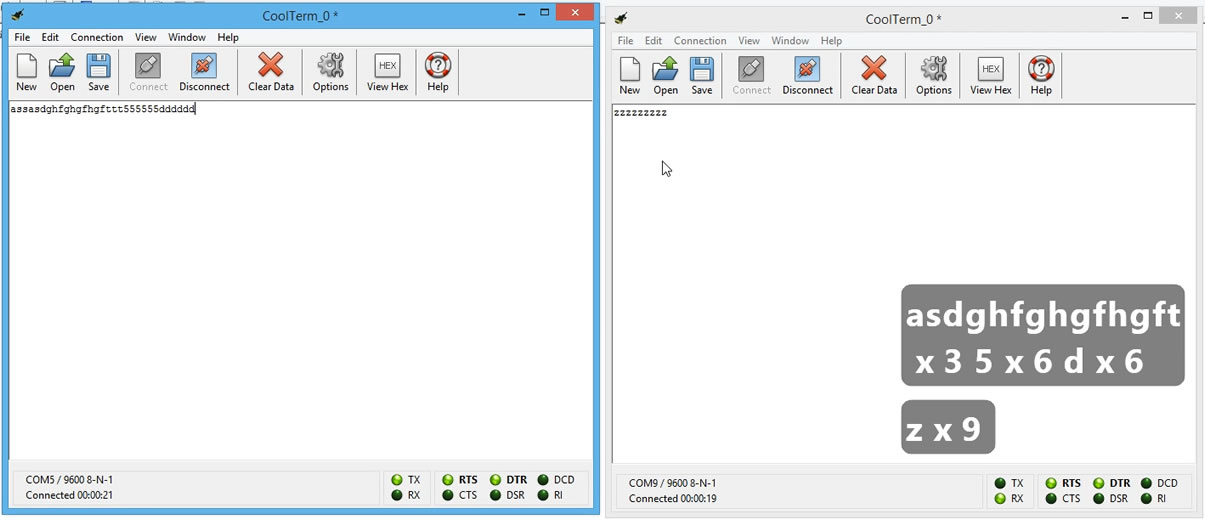
After the drivers are installed, we can now use software to connect, transmit and receive data using the modules. I use CoolTerm, a program tool that has a very nice and solid interface to connect, use and test serial communication ports. The idea is simple; we open two CoolTerm windows, one for each USB module. We use the options dialog to set the port the speed and various connection settings; then we hit the connect button to connect to each module. Now, whatever we transmit from one terminal window, it transmits to the other one and vise-versa.
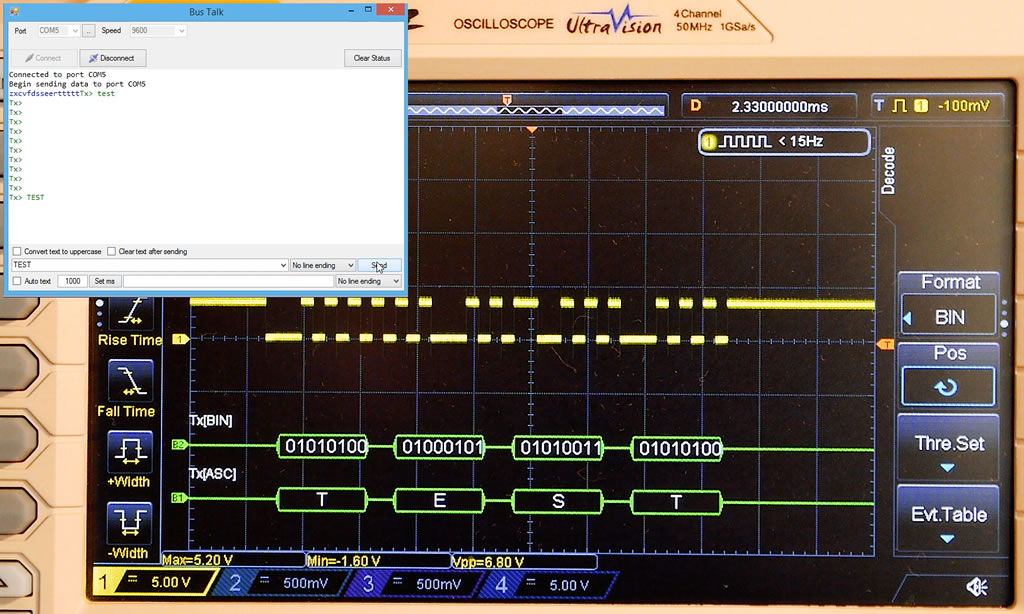
The data is transmitted byte after byte and we can even use an oscilloscope trigger mode to inspect the transmitted data. I have the Rigol DS1054Z, and it has a very handy decoder function that can be used to inspect the data in ASCII and binary form. To set the decoders, we simply press the math button and we choose between each mode, depending on what values we need to inspect. I set one for binary and the other one for ASCII values. We connect the oscilloscope probe to the USB module ground and to the Tx pin. Now and with the oscilloscope at trigger mode, whenever we transmit something from that module, the data will be captured and displayed on the oscilloscope monitor. It’s a nice way to understand how serial communication devices transmit data.
And here is a sample code on how you can utilize serial port communication using C# and Visual Studio SerialPort component
// We use SerialPort component properties to set the port the speed and then open the connection
serialPort1.PortName = comboBoxSerialPort.Text.Trim();
serialPort1.BaudRate = Convert.ToInt32(comboBoxSerialSpeed.Text);
serialPort1.Open();

// To disconnect, we just simple call the Close() function of the SerialPort component
if(serialPort1.IsOpen)
{
    serialPort1.Close();
}
Receiving and transmitting data using the SerialPort component
// We define a static string variable so we use it inside the SerialPort DataReceived event
// whichruns on a different thread than the form
static string StatusText;

private void WriteStatusLine(string text)
{
    textBoxStatus.AppendText(String.Format("{0}\r\n", text));
}

private void DisplayThreadText(object sender, EventArgs e)
{
    WriteStatusLine(StatusText);
}

// We can't use form controls directly from inside DataReceived SerialPort event
// that's why we use Invode to create an EventHandler and call the DisplayThreadText function
// whick will use the static string StatusText to set the status text box
private void serialPort1_DataReceived(object sender, SerialDataReceivedEventArgs e)
{
    StatusText = serialPort1.ReadExisting();
    Invoke(new EventHandler(DisplayThreadText));
}
To send data, we can use WriteLine function of the SerialPort component
private void buttonSend_Click(object sender, EventArgs e)
{
    if(serialPort1.IsOpen && textBoxDataSend.Text.Length > 0)
    {
        serialPort1.WriteLine(textBoxDataSend.Text);
    }
}
The C# project source code is uploaded on Github: https://github.com/clytras/LytraxIO_SerialConnect